simulating router firmware for live demonstration, more advanced RE, or just giggles
So I needed to put together a live demonstration for a presentation I'm doing soon on the attack surface of embedded devices, and why the industry seems to want their devices vulnerable. I have never needed to boot a firmware image in such a controlled manner before, and decided this would be something nice to share with others so they can just get this kind of thing up and running without hassle for their warped projects. So without further ado, lets get started.
Before you set this up, you will need to set up a basic virtual machine with the GNU/Linux distribution of your choice. You will also need to have already extracted the firmware image into a folder called squashfs-root unless you want to do the smart thing, and apply these instructions to your own personal setup.
First open the /etc/inittab for your firmware image. locate the line for sysinit and take note of what it has there.
::sysinit:/etc/rcS
::respawn:/sbin/getty 115200 ttyS1
::respawn:/bin/sh
::restart:/sbin/init
::shutdown:/bin/umount -a -r
Ok, copy the squashfs-root folder to the root directory of the virtual machines disk image, then copy the following script into the root directory of the image as well after modifying it to meet the needs of your particular firmware image:
#!/bin/bash

export FIRMROOT="/squashfs-root"
export SYSINIT="/etc/rcS"

ifconfig eth0 10.0.3.10

# bind mount the important things so that this acts like a real linux system
mount --bind /tmp $FIRMROOT/tmp
mount --bind /sys $FIRMROOT/sys
mount --bind /proc $FIRMROOT/proc
mount --bind /dev $FIRMROOT/dev

# chroot into the firmware image, and launch the correct sysinit script for your firmware.
chroot $FIRMROOT /bin/sh -c $SYSINIT
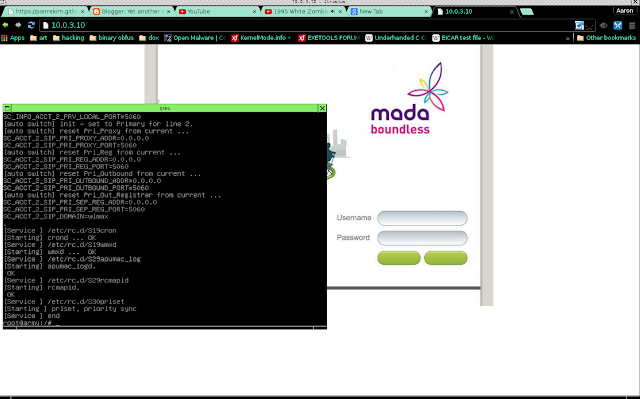
And thats how its done. Here is a screenshot of the web login for this router running in VM:

And here is a screenshot of the router VM being exploited:


Comments
Post a Comment